NodeCP Installation Guide
This guide walks you through the process of installing NodeCP Control Panel on your server via SSH.
VPS Configuration (Before Installation)
Before proceeding with the installation, ensure your VPS meets the following requirements:
- Operating System: Ubuntu 22 (Recommended), Ubuntu 18/23 (Supported)
- Minimum RAM: 2GB (4GB Recommended)
- Disk Space: 15GB minimum
- Root Access: Required
- DNS Configuration: Ensure your domain/subdomain A record points to your server's IP
- Optional: Port 25 enabled for email functionality
Installation Methods
1️⃣ Install with GUI (Recommended)
If you want a graphical interface for setup, use the following command:
curl -o bash.sh https://cdn.nodecp.com/bash.sh && chmod +x bash.sh && ./bash.sh
This script downloads and executes the NodeCP installation script with an interactive GUI prompt.
2️⃣ Install Without GUI (Direct Setup)
For a direct installation (non-GUI method) with a predefined domain, use:
curl -o domainbash.sh https://cdn.nodecp.com/domainbash.sh && chmod +x domainbash.sh && ./domainbash.sh -hostdomain panel.example.com
Replace panel.example.com with your actual domain/subdomain before running the command.
Configuration During Installation
1. Configure Domain Information
After starting the installation, you will be prompted to enter the main domain for NodeCP:

- Enter your panel domain (e.g.,
panel.nodecp.com) - Ensure your DNS A record is correctly set to your server's IP
- Press Tab to select "Ok" and Enter to confirm
2. Wait for Installation to Complete
The installation process may take several minutes.
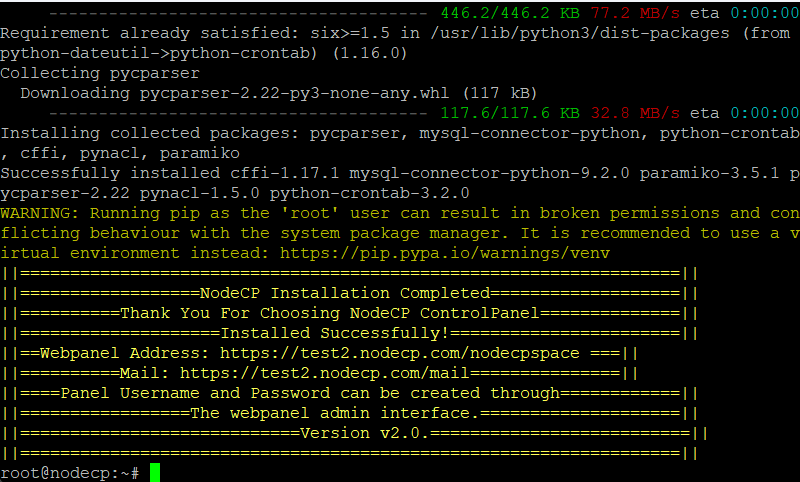
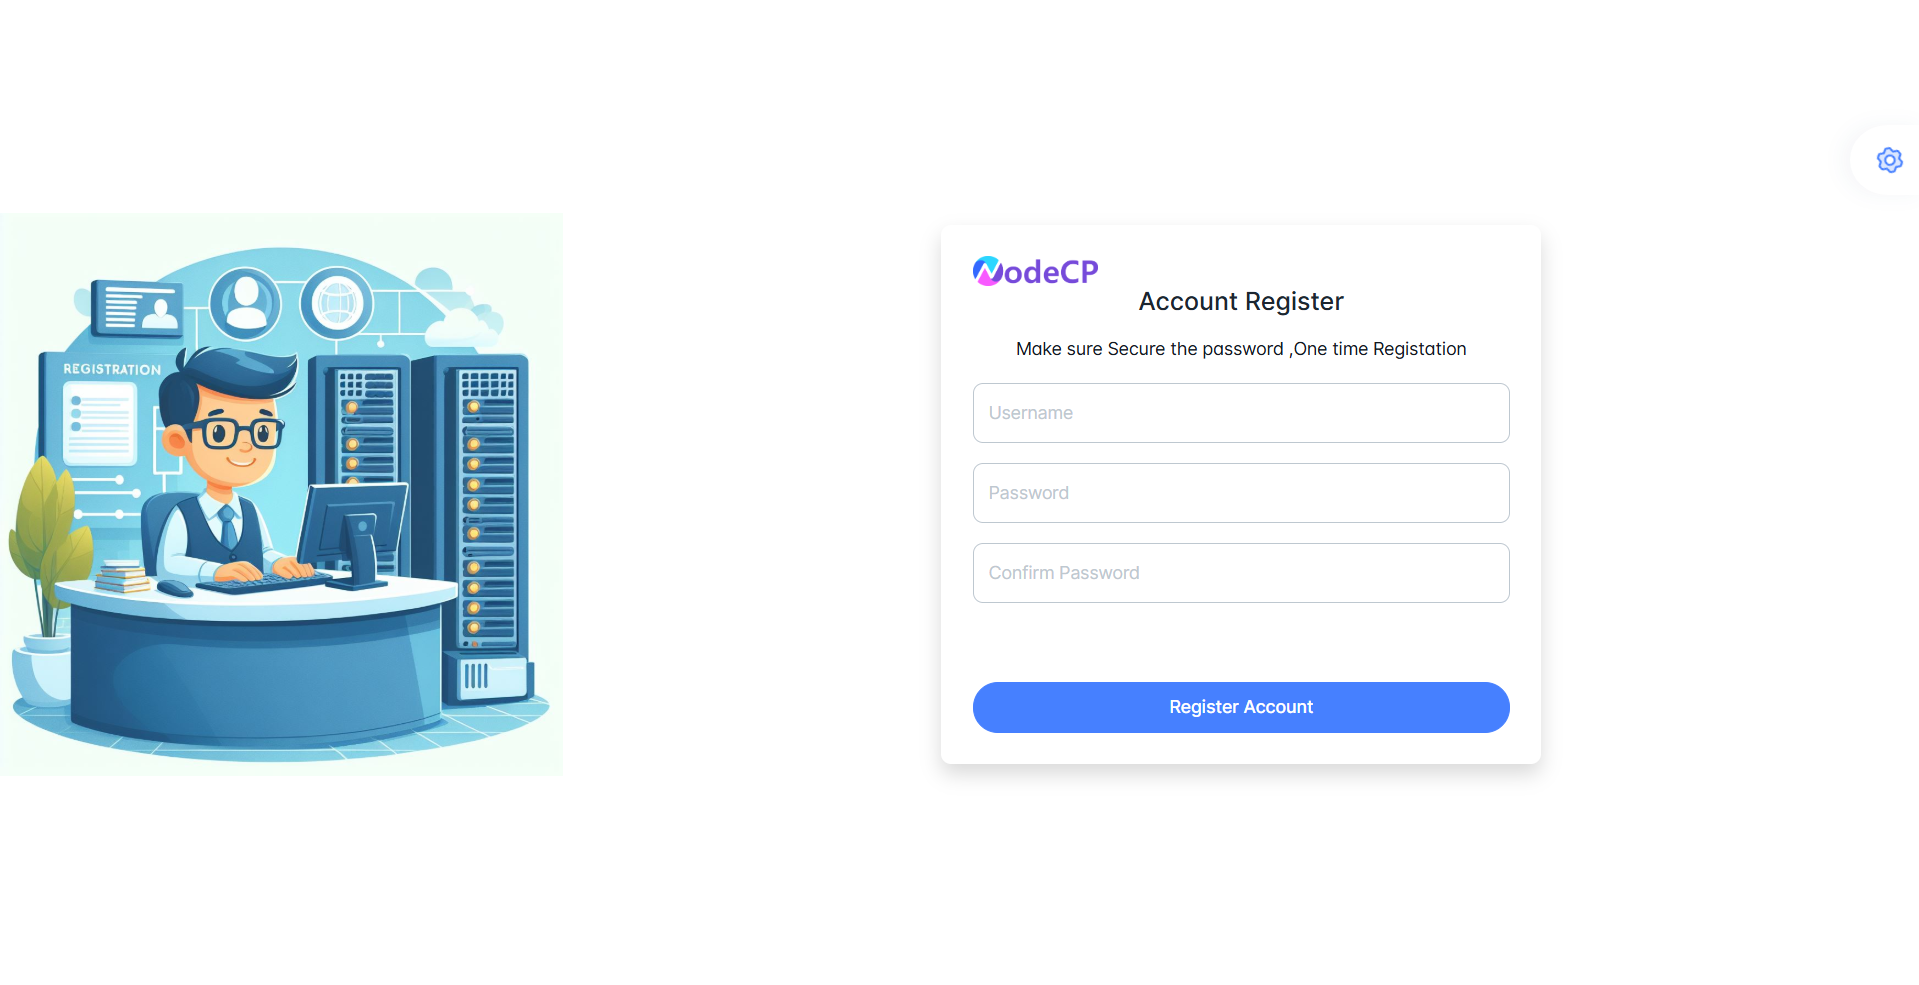
3. Access the Admin Interface
Once the installation completes:
- Open your browser and visit:
https://panel.nodecp.com/nodecpspace - You will see the admin login page
- Register your administrator account to begin using NodeCP
🚀 Automate VPS Setup with Cloud-Init
When creating a server, you can use cloud-init to automatically configure your server.
Copy and paste this Cloud-Init script during server deployment:
#cloud-config
package_update: true
package_upgrade: true

runcmd:
  - curl -o domainbash.sh https://cdn.nodecp.com/domainbash.sh && chmod +x domainbash.sh && ./domainbash.sh -hostdomain panel.example.com

write_files:
  - path: /etc/motd
    content: |
      Welcome to your NodeCP powered server!
      Access your panel at: https://panel.example.com/nodecpspace

users:
  - name: admin
    sudo: ALL=(ALL) NOPASSWD:ALL
    shell: /bin/bash
    ssh-authorized-keys:
      - your-ssh-public-key-here

final_message: "NodeCP installation is complete. Access your panel at: https://panel.example.com/nodecpspace"
How to Use This Script
- Copy & paste this script when creating a VPS.
- It automatically installs NodeCP during the first boot.
- Replace
your-ssh-public-key-herewith your SSH key.
Important Notes
- Ensure correct DNS settings before starting the installation.
- The GUI method is easier for beginners, while the Direct method is for advanced users.
- NodeCP provides complete hosting management tools including File Manager, SSL, Email, and Database control.
🔹 For further assistance, visit the official NodeCP Documentation.