Data Transfer
Overview
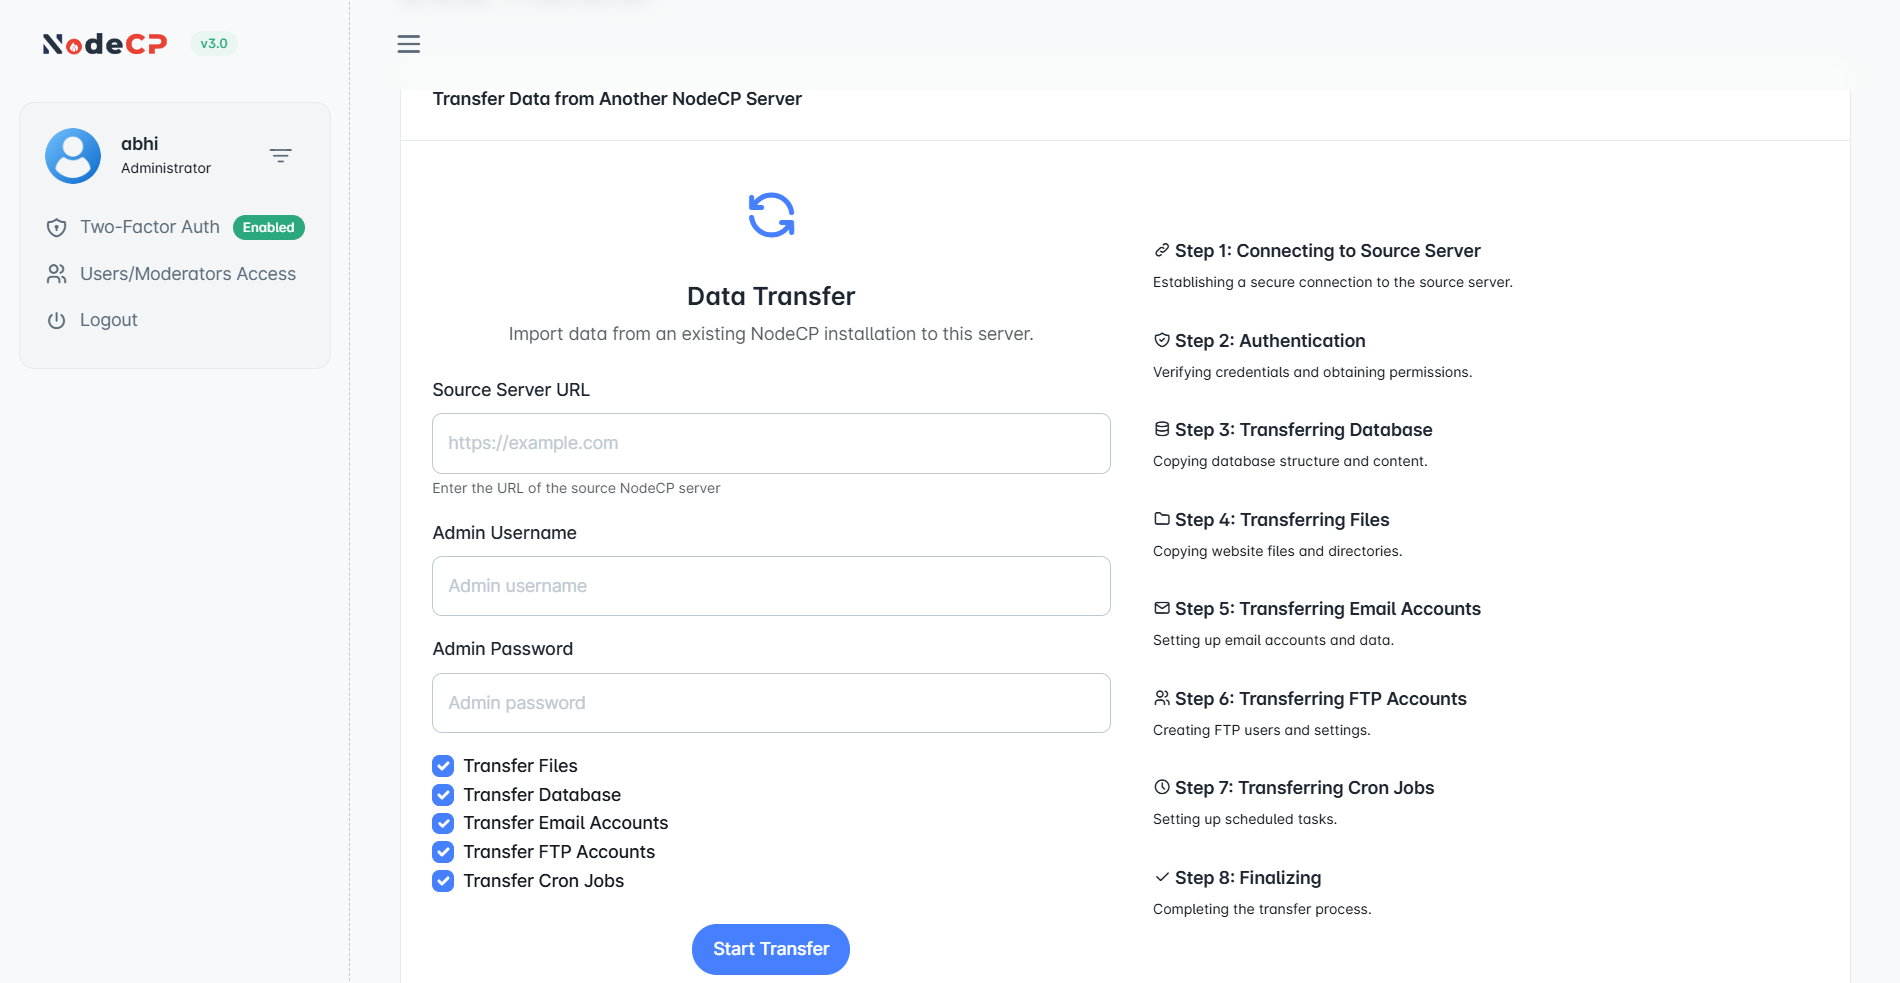
The Data Transfer feature in NodeCP allows administrators to migrate data from an existing NodeCP server to a new one. This ensures a seamless transition of databases, files, emails, FTP accounts, and cron jobs.
1️⃣ How to Transfer Data from Another NodeCP Server
This tool simplifies the migration process in 8 easy steps.
Step 1: Enter Source Server Details
- Source Server URL ➜ Enter the full URL of the source NodeCP server.
- Admin Username ➜ Provide admin credentials of the source server.
- Admin Password ➜ Enter the correct admin password.
🔒 Ensure the source server is accessible and has the correct permissions for data migration.
2️⃣ Select Data to Transfer
You can choose what data should be migrated:
- ✅ Transfer Files ➜ Move website files and directories.
- ✅ Transfer Database ➜ Copy all MySQL databases and tables.
- ✅ Transfer Email Accounts ➜ Migrate email accounts and settings.
- ✅ Transfer FTP Accounts ➜ Transfer FTP users and credentials.
- ✅ Transfer Cron Jobs ➜ Copy scheduled tasks.
✨ By default, all options are selected to ensure a complete migration.
3️⃣ Migration Process: Step-by-Step
The transfer process follows these steps:
🔗 Step 1: Connecting to Source Server
- Establishes a secure SSH connection to the source server.
🔑 Step 2: Authentication
- Verifies credentials and permissions before proceeding.
🗄 Step 3: Transferring Database
- Copies the database structure and content.
📂 Step 4: Transferring Files
- Transfers website files and directories.
📧 Step 5: Transferring Email Accounts
- Migrates all email configurations and data.
🔑 Step 6: Transferring FTP Accounts
- Moves FTP users and associated settings.
⏳ Step 7: Transferring Cron Jobs
- Copies scheduled tasks from the source server.
✅ Step 8: Finalizing
- Completes the transfer and verifies data integrity.
4️⃣ Starting the Transfer
- Review all selected options.
- Click the "Start Transfer" button.
- Monitor progress as each step is executed.
⏳ The transfer duration depends on the data size and network speed.
🚀 Why Use NodeCP Data Transfer?
- ✅ Fully automated process ➜ No manual intervention required.
- ✅ Secure connection ➜ Uses encrypted authentication for safety.
- ✅ Comprehensive migration ➜ Ensures all data is transferred successfully.
- ✅ Minimal downtime ➜ Keeps your website and services running smoothly.
🛠 Troubleshooting & Best Practices
| Issue | Solution |
|---|---|
| Connection error | Verify source server URL and credentials. |
| Database transfer fails | Ensure MySQL access is allowed remotely. |
| Files not transferring | Check file permissions and disk space. |
| Emails missing | Confirm that email services are active on both servers. |
🎯 NodeCP makes server migration seamless, secure, and hassle-free! 🚀